We live in a very rural area in Kentucky and love the simple life. I wanted to start a blog so I could share the things that go on in our exciting yet simple life and pass along some tips that will hopefully help others along their self sufficient journey.
Mar 9, 2012
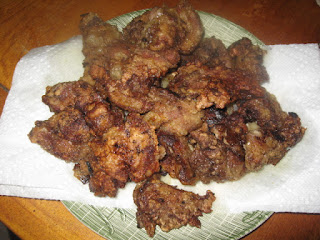
Fried Rabbit Livers.... Yumm...
Canning Venison/ Deer
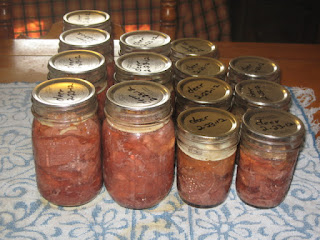
Okay, so I need room in my freezer...so I canned a lot of the deer...It is so-oooooo good canned anyway. I think I'll just keep the tenderloin in the freezer for grilling this summer and can everything else.
See the chilli canning post for the steps to beginning your canning.... and then prepare your deer meat by washing several times and I soaked it overnight in salt water as well.
Once you have your area prepped with the canning tools you can begin by adding your meat to the jars..
See the chilli canning post for the steps to beginning your canning.... and then prepare your deer meat by washing several times and I soaked it overnight in salt water as well.
Once you have your area prepped with the canning tools you can begin by adding your meat to the jars..
Canning Chilli
Okay, so I am running behind on my posts... Anyway.. before the big storm came I planned on doing a tutorial on canning... I canned chilli and some venison...I will show the venison in another post later...
First is the Chilli.....
First thing to do is get your jars ready...Wash them in Warm Soapy Water
Next ...get your lids ready to sterilize....In a small saucepan boil some water and then turn it to simmering and add your lids (Do not boil your lids)
You will also need to put your rings in some hot soapy water and get your other supplies gathered
You will also need a pressure canner . I have a presto and an All American... I like them both but when I want to can a bunch of smaller jars then I use my All American Canner as the presto will only hold one layer.
The All American has a pressure gauge and the lid screws down so it makes it impossible to blow up on you... I used to be terrified of my canner blowing up so that's why I love this one. I also like my presto because you don't have to keep as close of an eye on it because it has the rocker instead of a pressure gauge. You will want to have your canner on the stove filled with 2 to 3 quarts of water getting hot while you are packing your jars. You don't want the water to go up no more than half way up on your jars... if it does then you will need to dip some of the water out.
Next get a sterilized jar from the oven and pour the food through the funnel so that it doesn't get on the tops of your jars and I filled it to 1 inch from the top.
After you have filled your jars then take a wooden spoon and stick down in and get the air bubbles out
After that you will need to wipe the tops of your jars with the vinegar...
Then put your lids on
Next add your rings and tighten them up pretty tight.
Next start filling the canner with your full jars of food.
After you have processed your chilli for 90 minutes quarts or 75 minutes pints let the cooker release it's pressure on it's own and then remove the lid. Then start removing your jars with the jar lifter onto a towel.
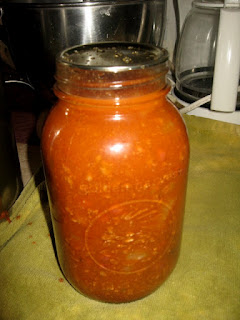
And now you have canned Chilli
After it has cooled...remove the rings and wipe clean and dry the jar. I then add the date and the contents of the food in the jar on top with a sharpie pen.
First is the Chilli.....
First thing to do is get your jars ready...Wash them in Warm Soapy Water
 |
| Then Put them on a cookie sheet in the oven at 225 degrees to sterilize them |
Next ...get your lids ready to sterilize....In a small saucepan boil some water and then turn it to simmering and add your lids (Do not boil your lids)
You will also need to put your rings in some hot soapy water and get your other supplies gathered
You will need a food funnel, a jar lifter, a ring lifter (my hubby made mine) and some vinegar in a bowl to wipe around the tops of the jars so that the lids will seal better.
The All American has a pressure gauge and the lid screws down so it makes it impossible to blow up on you... I used to be terrified of my canner blowing up so that's why I love this one. I also like my presto because you don't have to keep as close of an eye on it because it has the rocker instead of a pressure gauge. You will want to have your canner on the stove filled with 2 to 3 quarts of water getting hot while you are packing your jars. You don't want the water to go up no more than half way up on your jars... if it does then you will need to dip some of the water out.
Next get a sterilized jar from the oven and pour the food through the funnel so that it doesn't get on the tops of your jars and I filled it to 1 inch from the top.
After you have filled your jars then take a wooden spoon and stick down in and get the air bubbles out
After that you will need to wipe the tops of your jars with the vinegar...
Then put your lids on
Next add your rings and tighten them up pretty tight.
Next start filling the canner with your full jars of food.
After you have processed your chilli for 90 minutes quarts or 75 minutes pints let the cooker release it's pressure on it's own and then remove the lid. Then start removing your jars with the jar lifter onto a towel.
And now you have canned Chilli
After it has cooled...remove the rings and wipe clean and dry the jar. I then add the date and the contents of the food in the jar on top with a sharpie pen.
Subscribe to:
Posts (Atom)


